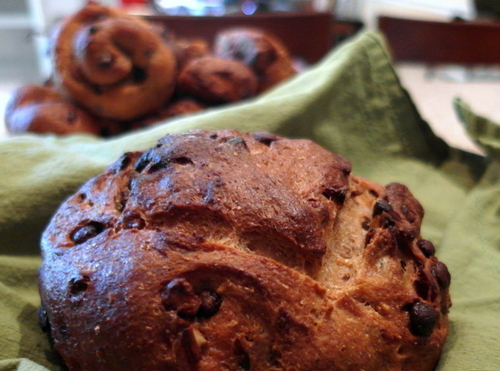
Hello Food Fans! Allow me to introduce you to Jenni from Pastry Chef Online! She is our Featured Foodie this week, and she brought a “Perfectly Imperfect Chocolate Cranberry Pecan Bread.” One of the great things about Jenni, is her huge wealth of baking knowledge. (Along with all her other basic awesome-ness!) If you ever have any questions about how to bake something, she is always there with an answer. On the rare occasion she doesn’t know, she’ll help you figure it out, until it works out! I adore her and you will too! Thank you for sharing this week Jenni! Take it away, my friend!
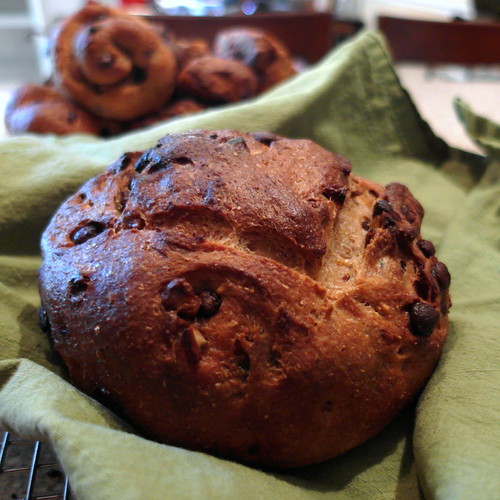 I love Sara from My Imperfect Kitchen. I love her joy and enthusiasm. And the fact that she has embraced her imperfections! Well, it’s what we all should do, really. As much as most of us Bloggy Types want to only share the gorgeous, the ooey-gooey-sexy and the twine-wrapped bundles of perfectly crispy cookies, the reality is that not everything that we make is always Blog-ready. Yes, I am making a generalization, and other Bloggy Types can dispute my Pronouncement, but honestly, in the real world, not everything is always perfect.
And that’s just fine. Don’t get me wrong. I don’t like to fail or make mistakes, but once I realized that I can learn so much more from my failures than I can from my successes, I stopped feeling so bad about myself. As obnoxious as it is when manager-types talk about “opportunities” rather than problems, our less-than-perfect results in the kitchen give us an opportunity to learn from our mistakes so we don’t make the same ones twice. Hopefully.
When Sparkly Sara asked me to write a guest post for her many moons ago, I asked her to remind me because I have, and I quote, “a smooth brain,” and would forget. As promised, she did remind me on Tuesday. And I had indeed forgotten. She had asked me to do a bread-type item and since it had slipped off of my smooth brain, I turned to my wonderful fans and asked them to help figure out the ingredient list.
I knew I was going to start with some locally milled flour that I had just gotten a couple of weeks ago as well as some evaporated milk. I had bought a mulit-pack at the warehouse store because I needed one can to make a Thing, and when I asked the fans (I rely on them heavily for inspiration) what I should do with the extra Five Cans, some of them said “bread!” But as to the rest, I left it to The Gang.
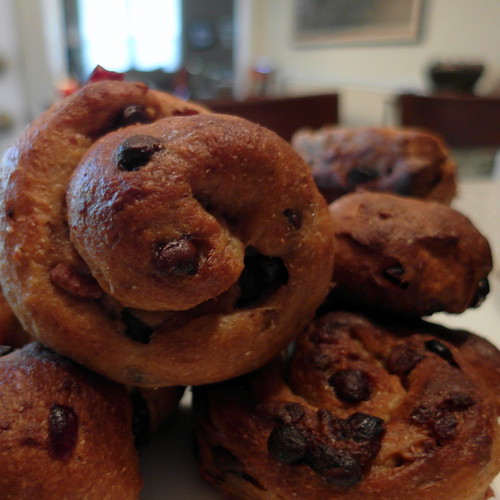 The final ingredient list read like this: bread flour, keen local flour, evaporated milk, yeast, salt, honey, olive oil, chocolate chips, dried cranberries and pecans. Sounds like a can’t miss list to me!
Let me flash back to maybe 15 years ago or so. The Beloved’s friend was coming to visit, and I wanted to make some bread to mark the occasion. The only problem was that I’d never made bread before. I gamely chose a recipe and went to town. I ended up with a ridiculously goopy mass of dough that ended up having the texture of pound cake. It barely rose and was just…odd. It tasted okay, but it wasn’t really bread.
Looking back, I realize now the vast laundry list of mistakes that I had made, but then, I just felt defeated. And as much as I have improved at bread making and baking in general, I try to never forget how it feels to screw up royally. Teaching folks the science behind baking in a conversational, accessible and non-threatening way is now a huge part of why I’m out here on the Internet. Allow me to share some Fun Science-y and Non-Science-y Bits with you now.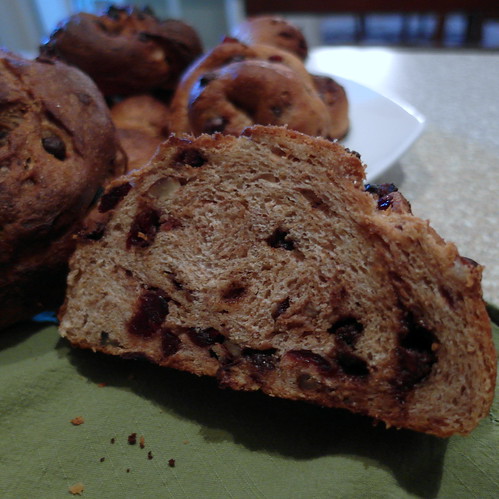
- Buy a scale and an instant read thermometer. Both will make you a more accurate and happy baker. Honest.
- Folks have been baking bread forever. Since before Kitchen Aid even. And scales, for that matter.
- Yeast does what it does. The only thing you can do to make yeast not do what it does is to kill it. If water is too hot to be comfortable for you, it’s too hot to be comfortable for yeast, and they will die in protest. That’s really all you need to know.
- When people decided they wanted to be able to make exactly the same bread every single time, they came up with a Thing called baker’s percentage. It sounds scary and Math-ish, but all it means is that whatever your flour weighs=100%. The water is expressed as a percentage of the weight of the flour. So, if a Baker Type tells you his bread is at “65% hydration,” that means that his water weighs 65% the weight of the flour. Or, for every 10 oz of flour, he’s using 6.5 oz of water. Easy, right? Yes!
- Most breads fall somewhere between 58%-68% hydration. (For those keeping score, that’s between 5.8 and 6.8 oz water per every 10 oz of flour)
- The amount of fat you use in the dough doesn’t count towards hydration since fat doesn’t help gluten form. And gluten is what provides wheat breads with their structure.
- Evaporated milk is about 1/3 fat and milk solids and 2/3 water. So, to use evaporated milk as the liquid, know that for every ounce you use, you’re really only using 2/3 an ounce of liquid. In other words, a 12 oz can of evaporated milk is actually 8oz of water-type liquid and 4 oz of milk solids and fats, neither of which count towards hydration. I didn’t pay attention to this at first and ended up adding 4 extra ounces of water to get the texture I wanted. Which now makes perfect sense. Yay, science!
- If the math scares you, it’s okay to go by feel. Bread dough should be springy and smooth after a few minutes of kneading. If it’s hard to pull on or shove your finger into, it needs more water. It’s better to use a bit too much water than not enough.
- I always used to keep adding more flour if I thought my dough was sticky. I’d end up with dense bread and a sad heart. To keep from adding more flour, especially if you’re going to knead by hand, spray your hands and work surface with pan spray or rub them with olive oil before kneading. The dough won’t stick, and you won’t end up adding too much flour.
- Use a hearty all-purpose flour or bread flour to make bread. The more protein in the flour, the more water it will absorb and the more gluten will form. Lower protein flours, like White Lily or cake flour, don’t contain enough gluten. Your dough will end up more like a batter and your bread won’t rise. That’s what happened to me fifteen years ago. Now you know better than I did. You’re welcome.
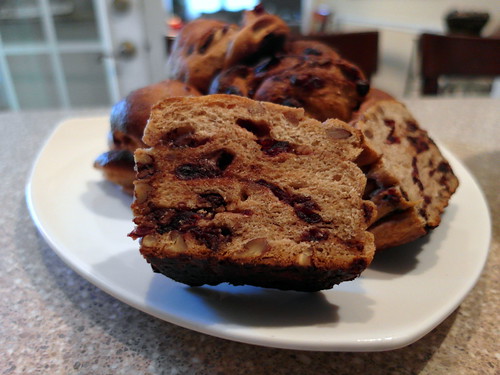 And now, let me share with you my Imperfectly Perfect Crowd-Sourced Bread with you. I think you will enjoy it! You can also call it Sara’s Bread if you want, since I made it for Sara.
- 12 oz bread flour
- 12 oz whole wheat flour
- 1 1/2 teaspoons fine sea salt
- 1 1/2 teaspoons active dry yeast
- 2 oz honey
- one 12-oz can evaporated milk, well shaken
- 4.5 oz water
- 2 oz water (reserved if you need it)
- 1.5 oz extra virgin olive oil
- 6 oz milk chocolate chips
- 4 oz dried cranberries
- 3 oz toasted pecans, chopped
- Proof your yeast in the 4.5 oz of water along with a wee portion of the honey. As long as it gets foamy, you’re good to go.
- Put all the rest of the ingredients except for the reserved water, chips, cranberries and pecans in your mixer bowl along with the proofed yeast.
- Fit the dough hook onto your mixer and mix for a couple of minutes on low-speed to make sure everything is incorporated. If the dough seems stiff, add the extra water, a tablespoon at time, until the dough is supple. You might not need all of the water, and that’s okay.
- Turn the mixer on to medium-low speed and let knead for 6-8 minutes. The dough should feel soft and supple but not be sticky. You should be able to grab a piece of it and pull on it and have it stretch farther than you think it will.
- Work the dough into a ball, and place it smooth side up in the mixer bowl (why get another bowl dirty?)
- Spray with pan spray or brush with olive oil. Cover and let rise until doubled in bulk. It took mine about 3-4 hours just sitting on the counter.
- Press the gases out of the dough and reattach the dough hook to the mixer. Knead in the mixins until they are evenly distributed. You can certainly do this by hand, if you want.
- Form into a smooth-ish ball (of course, there will be nuts, chips and cranberries sticking out all over the place. Worry not).
- Spray with pan spray or brush with olive oil. Cover with plastic wrap and refrigerate for 8-12 hours.
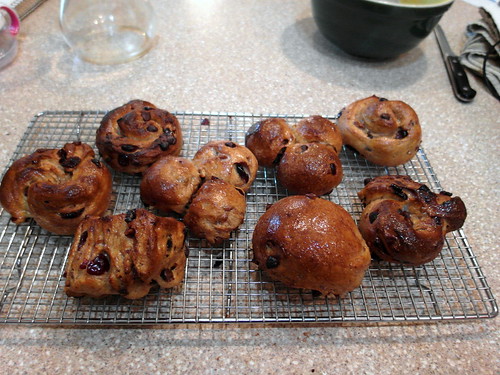
- Once the dough is out of the fridge, you can form it into two loaves or make a bunch of rolls. Or make one loaf and some rolls. I scaled my large round (yes, I weigh everything) at 18 ounces and the rolls–all the shapes–at 4 ounces apiece.
- Cover and let rise until back up to room temp and not quite doubled. This took a couple of hours.
- Bake at 375 until you reach an internal temperature of 200-205F. If your guys seem to be browning more than you’d like, cover them loosely with foil.
- It took my loaf about 40 min to bake and the rolls all took right around 20 minutes or so.
- Let cool to warm and then dig in. I brushed everyone with melted butter when they came out of the oven. Feel free to do the same.
 Thank you, dear Sara, for asking me to guest post, and double thank you for reminding me! I hope you and your readers have enjoyed this little foray into the world of creating your own bread recipe. And if anyone has any questions, I shall be lurking about to answer them. Not in a creepy way. In a helpful way.
